

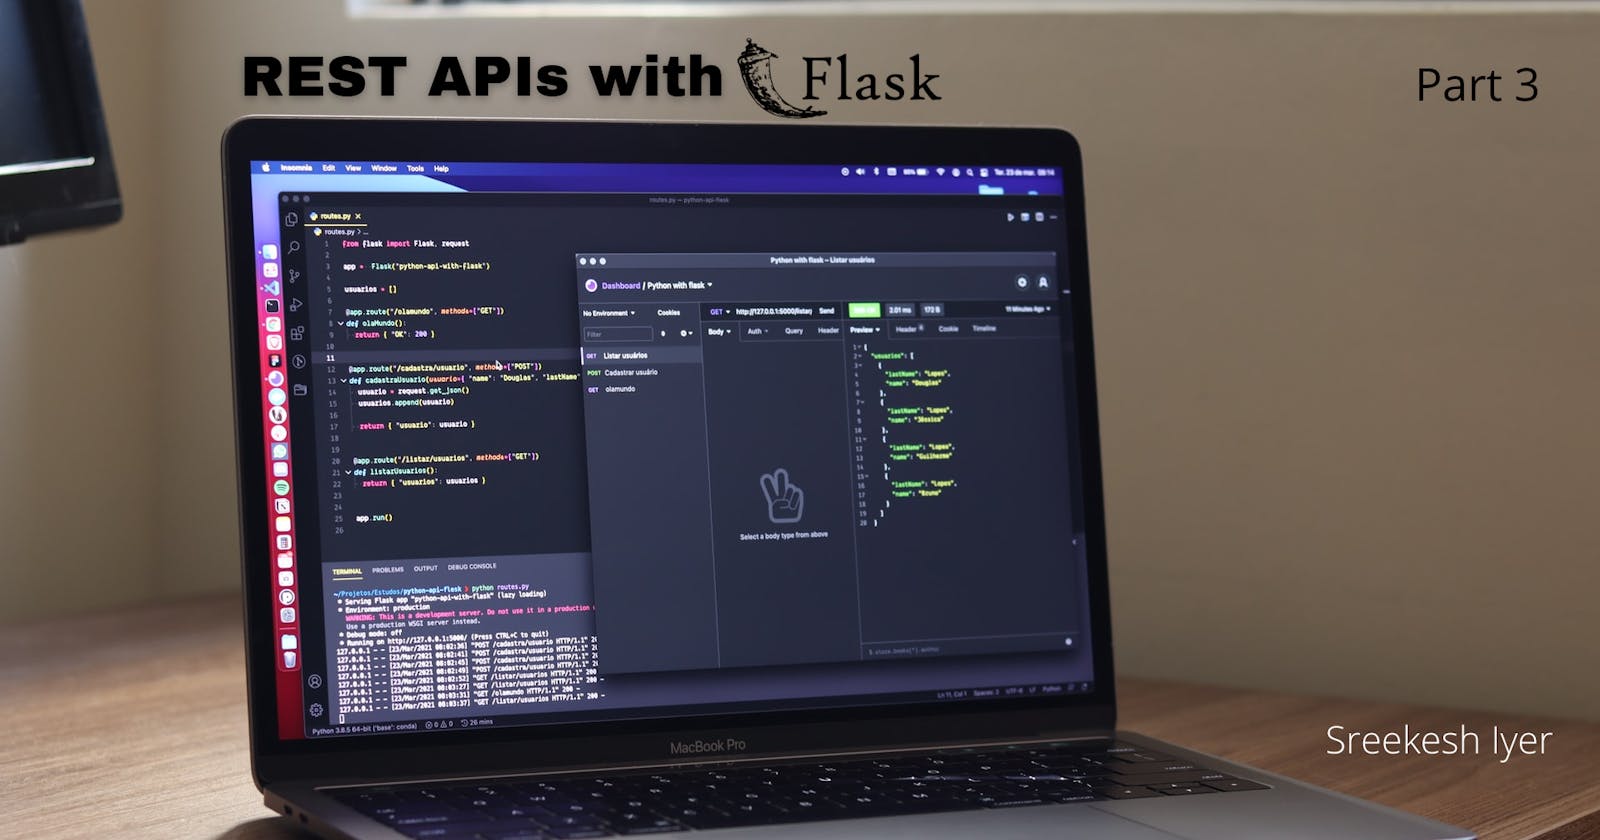


Welcome to Part 3 of the Python Flask API Series. I'm really glad you've made it till here.
If you have followed along so far, you will have a RESTful API which returns a list of your favorite games from our database and also helps you add games to this list. If not, you can clone this GitHub repository and code along. (Make sure you clone the branch named 'part-2')
Once done with the setup, grab a cup of coffee and let's get going!
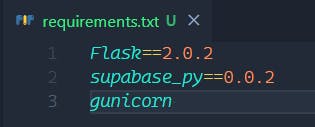
Creating a requirements.txt file
When we deploy our application to heroku (or any platform), our application essentially runs on a remote computer, which is going to need all the python modules we used in our application. We can generate a list of these requirements using pip freeze
python -m pip freeze > requirements.txt
For me, this generated a huge list of modules which are probably sub-dependencies. So what I did instead was simply keep Flask and supabase_py in the text file and removed everything else.
To this text file, make a new line and add the word 'gunicorn'. I'll explain this in a while.
This is what the file looks look like now -
What is Gunicorn?
To run our application on a web server in production, we need to install a module called 'gunicorn'. Gunicorn is a Python WSGI HTTP Server for UNIX.
Since we do not use this in the development environment, we didn't install it using pip and instead added it directly to the requirements.txt file.
Creating a Procfile
A Procfile is a file which has a set of commands to be executed by the app on startup. What we need to do is essentially run our Flask app using gunicorn.
So, create a new file in the same directory with the name 'Procfile' like so -

web: gunicorn app:app
What we did here, is basically write a command for starting up the application in production. Congratulations, you probably wrote your first Procfile!
Signing Up on Heroku
 Heroku is as they define it, a container-based cloud Platform as a Service (PaaS). What it means for us is that we essentially get to deploy our applications on this platform so that they are live on the internet.
Click here, fill in the details and Sign Up on Heroku.
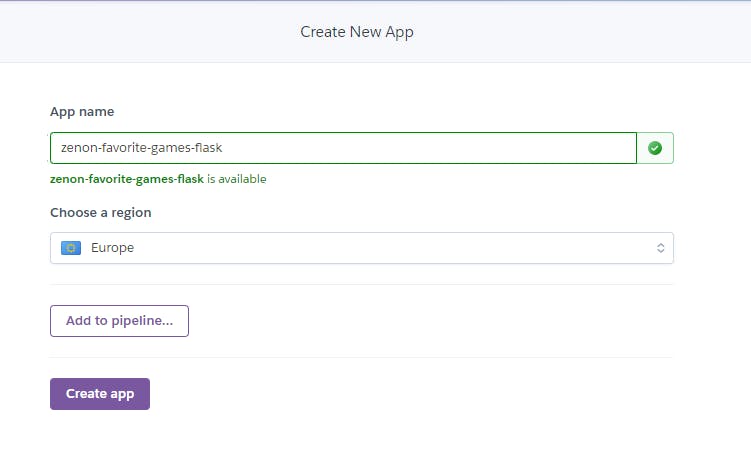
Once you sign in, you'll be redirected to the Heroku Dashboard.

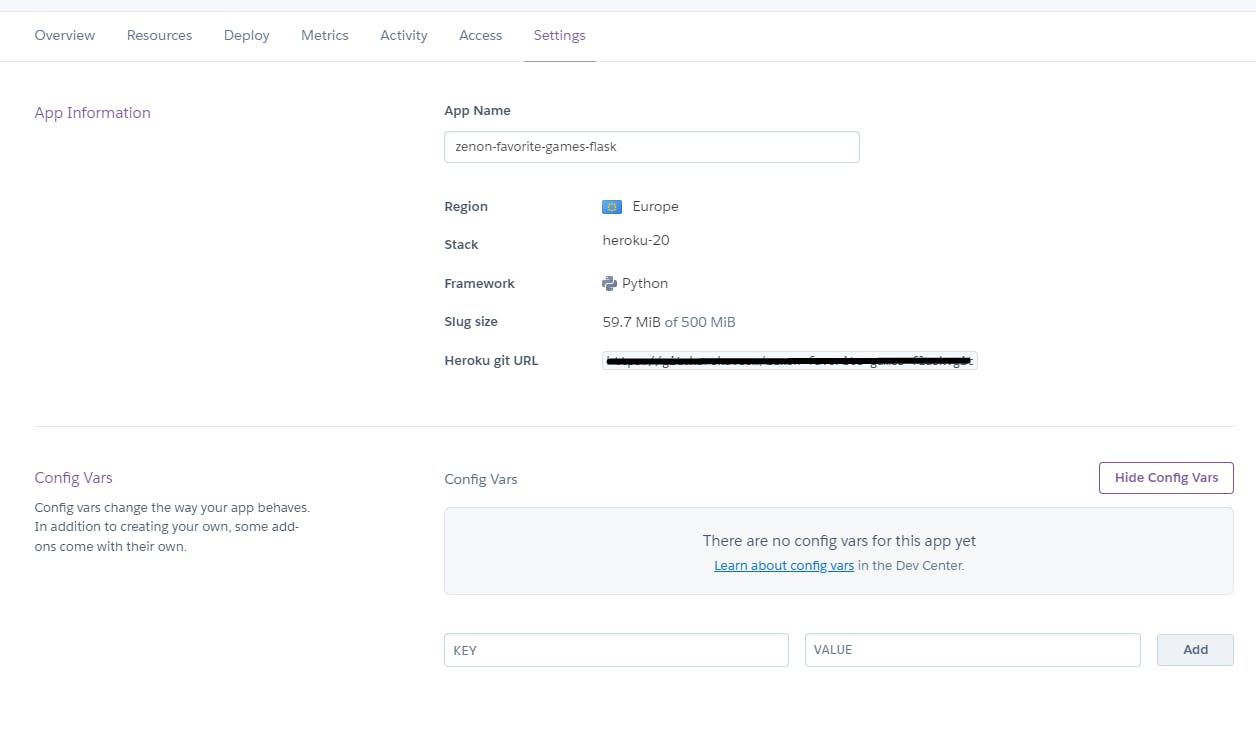
Create a New App by clicking the button on the top right, give a unique name to the app and choose a region (preferably closest to you)
Installing the Heroku CLI
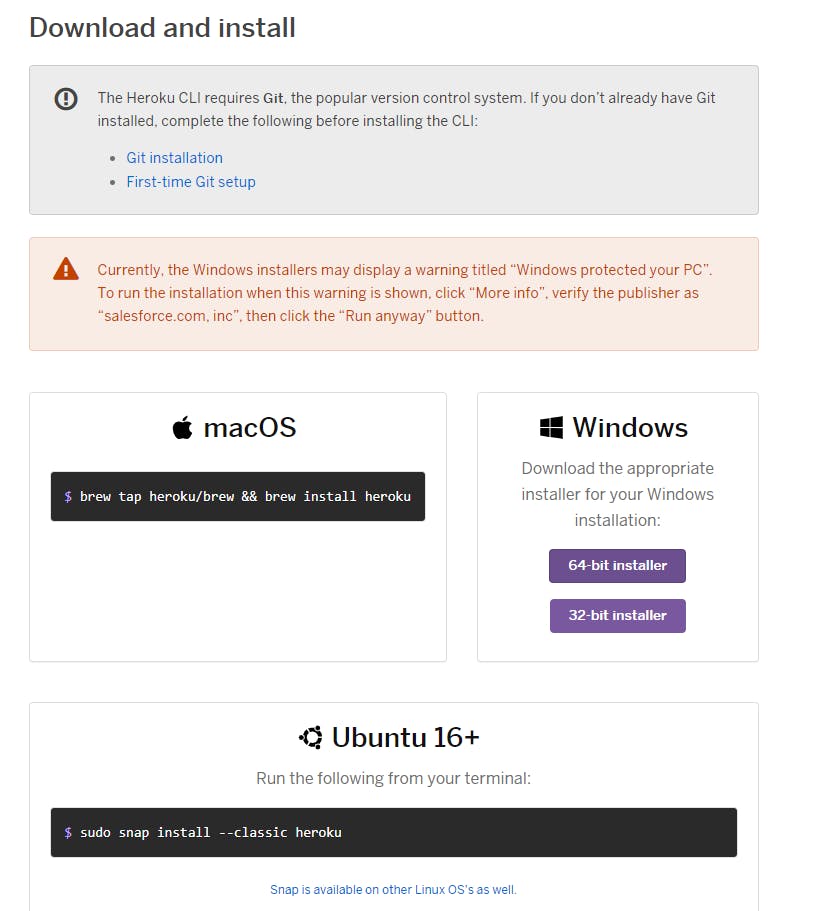 To maintain a Heroku Code Repository, we need to install its CLI (Command Line Interface). Click here to download and install it for your Operating System.
Once the installation is complete, you can use the heroku version command in your terminal to confirm that it's installed successfully.

Logging into Heroku using the CLI
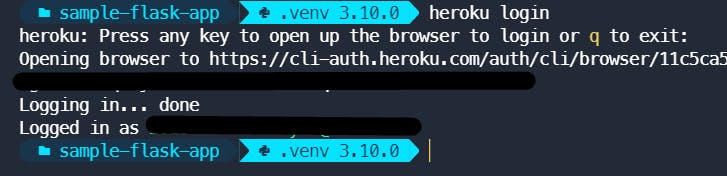
Open the terminal in your app' directory and run heroku login to initiate a login. It'll open up a tab in your browser where you can login to Heroku. Once done, we can create a new git repository and push it to heroku.
Deploying to Heroku
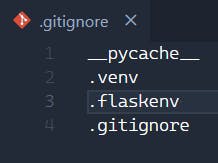
Create a .gitignore file and add the __pycache__ and .flaskenv files to it, so that they are not pushed to Heroku
Create a new Git Repository, add all files, make a commit and push the files to heroku, like so - (Make sure you get your app name right)
git init
git branch -M master
heroku git:remote -a <YOUR_APP_NAME>
git add .
git commit -m "First Deployment"
git push heroku master
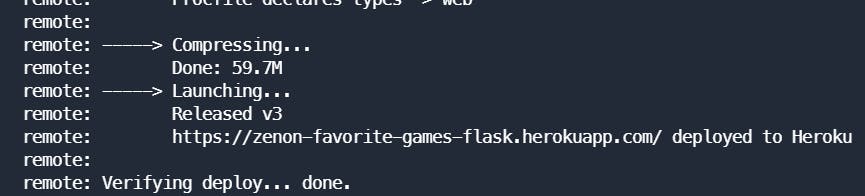
If you see this message on your terminal, we are almost there. Now, go back to the Heroku Dashboard and choose 'Settings'.
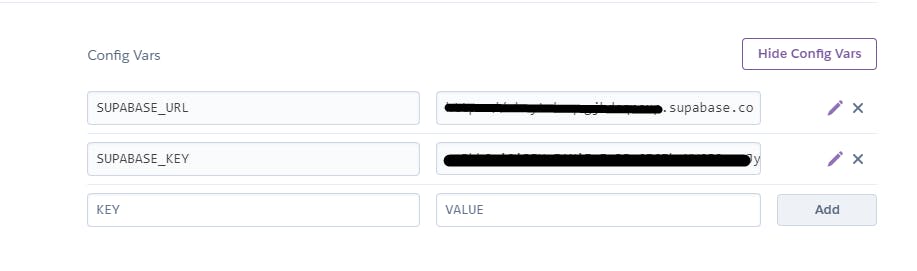
Click on Reveal Config Vars so that we can add our Environment Variables
We can find these in our .flaskenv file. We'll add all variables except the FLASK_ENV one, because that was for the dev server, not to be used in production. After adding all environment variables, it should look like this -
That's it, we should be good to go. Click on 'Open App' on top of the Dashboard.

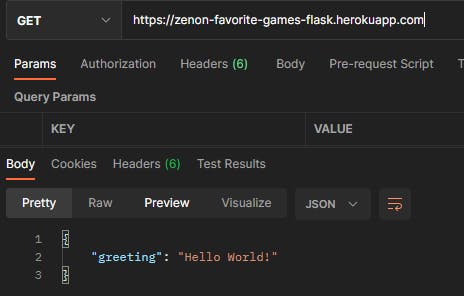 There we have it, our app is up and running perfectly in production.
We can also check other routes.
There we have it, our app is up and running perfectly in production.
We can also check other routes.
/games
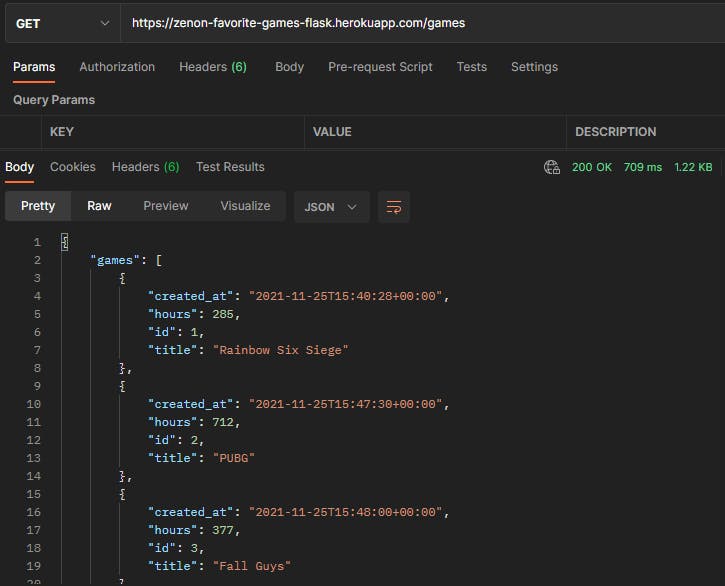
That's AMAZING, we just deployed our Flask Application to heroku!
With that, I'd like to conclude the Python Flask API Series, I hope you liked working with Flask and Supabase. Thank you so much for coding along with me until here. I hope you go on and make some amazing applications using the technologies we used in your future projects. Thank you for reading, have a great day :)